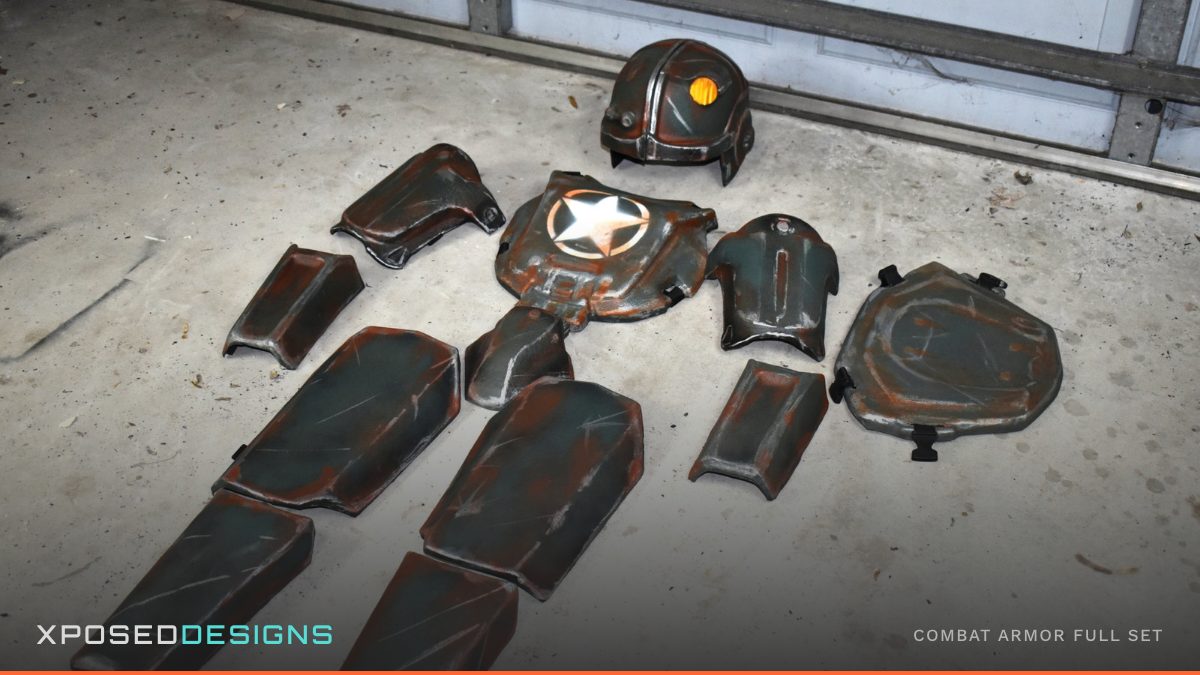
Combat Armor Build Guide: A Lighter First Project for New Cosplayers
Power armor gets most of the attention in armor cosplay, and for good reason, it's dramatic and instantly recognizable. But it's also a significant undertaking: substantial piece count, real weight, and a build timeline measured in dozens or hundreds of hours depending on the variant. Combat armor is the other end of that spectrum, and it's one of the most underrated entry points into armor cosplay.
This guide covers why combat armor is a smart first build, what the kit includes, and how to approach assembly, paint, and wear.
Why Combat Armor Is a Strong First Project
Combat armor is the wasteland's practical, utilitarian look: worn military gear rather than a sealed power suit. That practicality translates directly into build advantages for a first-time armor cosplayer.
Fewer pieces, simpler geometry. Where a power armor suit involves complex, sculptural forms across an entire body, combat armor is built from more straightforward panel shapes. That simplicity doesn't just save build time, it also gives you a much shorter list of things that can go wrong during assembly.
Lighter to build and to wear. A combat armor set is meaningfully lighter than a full power armor suit, both because there's less total material and because the design itself doesn't call for the bulk of a sealed power suit. That translates to real comfort over a full convention day, and to an easier attachment strategy since you're not engineering a harness system to distribute heavy weight.
A forgiving paint scheme. The classic worn military olive or khaki look, with realistic weathering, is genuinely achievable for a beginner with spray cans and basic dry-brush and wash technique. You don't need advanced masking, multi-layer color transitions, or airbrush skill to get a convincing result.
A recognizable wasteland build without the full power armor commitment. For builders who want a strong, in-genre cosplay without a multi-month project, combat armor consistently performs well at conventions while asking far less of the builder in time and skill.
Our difficulty rankings guide rates combat armor beginner-to-intermediate, one of the most accessible full armor builds in our entire lineup.
What's in the Kit
The Combat Armor full set ships as thermoformed ABS shells, available across DIY unassembled, assembled, and assembled-and-painted tiers, the same tier structure as the rest of our lineup. As with all of our kits, check the current listing for the exact pieces included in the set before you start planning your build, since specific configurations can be confirmed at the point of order.
Lay out every piece when your kit arrives and dry-fit before committing any adhesive. This is a good habit on any build, but it's especially fast and easy to do on combat armor given the more manageable piece count.
Step 1: Assemble Before You Paint
The same rule applies here as on every ABS kit: assemble first, paint the assembled piece second. The adhesives that bond ABS pieces together (contact cement for flexible joints, epoxy for rigid ones) will peel cured paint off any surface they touch, so getting the order right the first time saves you a rework cycle later. Our contact cement vs. epoxy guide covers which adhesive fits which joint.
Combat armor's simpler geometry makes this step faster than it would be on a more complex build. Fewer panels, fewer seams, and less compound curvature to align means less time spent on assembly and more time available for the paint and finishing work that determines most of the final look.
Step 2: Paint for a Worn, Practical Look
Combat armor's whole visual identity is "gear that's actually been used," which makes it a genuinely fun and forgiving piece to weather. Follow the full process from our ABS painting guide: clean, base coat, detail, weather, seal.
Base coat: a muted olive, khaki, or worn tan reads as authentic practical gear. Krylon and Rust-Oleum both work well as base coat brands, with Camo-brand spray paint for a flat, no-shine finish that matches the apocalyptic aesthetic without needing a separate matte clear coat.
Weathering does more work here than on almost any other piece. Dry-brushed edge wear, a dark wash pooled into panel lines, and a few sponge-stippled chip marks at stress points will do most of the heavy lifting toward a convincing "survived the wasteland" look. This is a great piece to practice weathering technique on before tackling a more complex, higher-stakes build.
Keep the finish matte. Gloss or satin reads wrong on practical, worn gear. A matte clear coat (or skipping clear coat entirely and relying on a flat base and Camo topcoat) suits this build's whole aesthetic.
Step 3: Strap and Wear-Test
Combat armor's lighter weight simplifies attachment considerably compared to power armor. Industrial Velcro handles most of the flat chest and back panels well on its own, without necessarily needing the internal harness system that heavier power armor pieces require for weight distribution. Our attachment guide breaks down the full range of methods if you want to mix in snaps or magnets for smaller pieces.
Because the whole build is lighter and less bulky, mobility tends to be less of a concern than it is on a full power armor suit. Still do a full wear test: walk, sit, and move through a normal range of motion before your event, not the night before.
Realistic Timeline
Combat armor is one of the fastest full builds in our lineup. A motivated first-time builder working from a kit can realistically complete assembly, paint, and strapping in a single extended weekend of active work, spread across a couple of weeks to allow proper cure time between coats. Our 90-day build plan still applies as a useful planning framework, just compress the phases; combat armor doesn't demand the extended timeline a full power armor suit does.
If you're weighing combat armor against other first-build options, our beginners guide covers the broader decision framework for a first project. Browse the Combat Armor full set and the rest of the lineup at xposeddesigns.com/collections/all.
Building combat armor as your first project? Tell us about it in the comments, we love hearing about first builds. Follow @XposedDesignsLLC on Instagram for build and weathering walkthroughs.