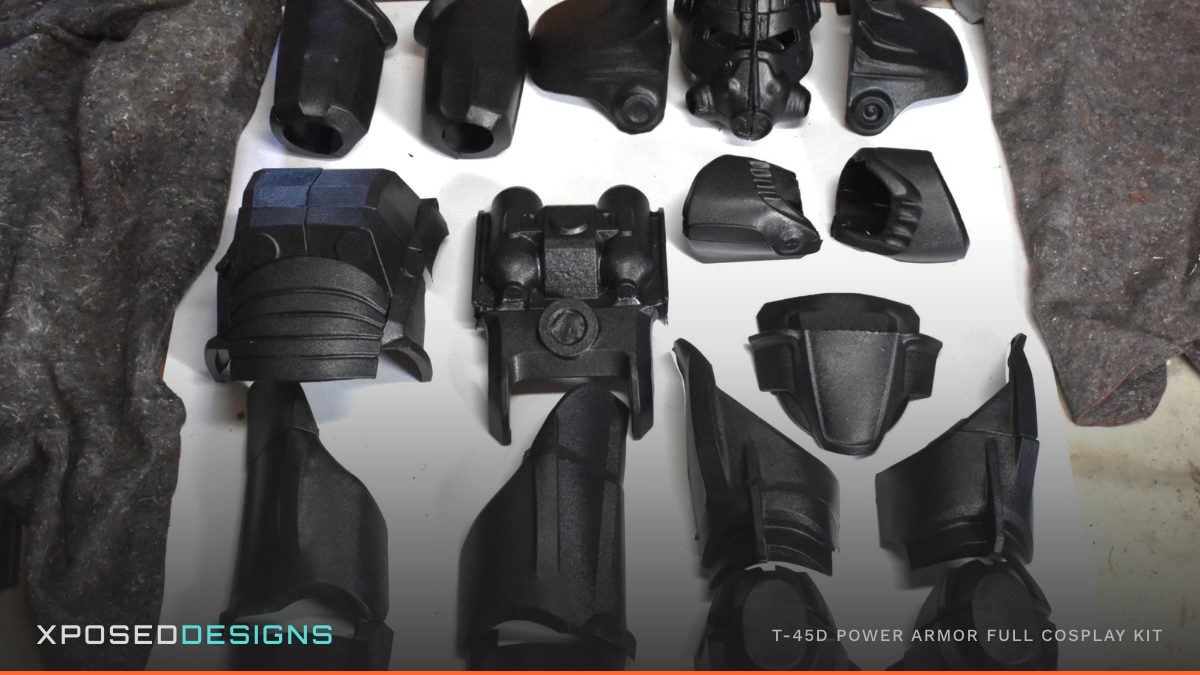
How to Paint ABS Plastic Cosplay Armor (Step-by-Step)
So you've got your armor kit in hand, or you're thinking about ordering one, and you're staring down the barrel of the painting process. Maybe you've painted EVA foam before. Maybe you've watched a few YouTube tutorials and feel mostly confident. Either way, if you haven't worked with ABS plastic before, there are a handful of things that'll trip you up if nobody warns you in advance.
This guide walks through the complete painting process for ABS plastic armor, from clean raw plastic to a sealed, convention-ready finish. We'll cover every major step, the materials that actually work, the ones that don't, and the most common mistakes to skip. It's the same process we use on every painted tier kit we ship.
If you want the background on why ABS is worth the extra effort in the first place, check out our post on ABS vs. EVA foam: which material is actually better for cosplay armor. The short version: ABS holds its shape under convention conditions far better than foam, and it accepts paint cleanly with very little prep.
Why ABS Is Forgiving to Paint (Once You Know the Order of Operations)
Foam is porous. Paint soaks into the surface and grabs hold. ABS is non-porous, which means paint sits on top of the surface rather than bonding into it. That sounds like a problem, but the ABS plastic XposedDesigns uses for our kits (especially the textured variants) takes paint extremely well straight out of the box. You can spray paint a base coat directly onto raw ABS, layer acrylics on top of that for detail work, and seal it later with polyurethane if you want extra protection.
The single thing that derails painted ABS armor is not the paint itself: it's painting the pieces in the wrong order. Assemble first, paint second. Our kits are designed to be bonded together with Contact Cement or Starbond Adhesive Epoxy, and both of those will peel cured paint right off the panels they touch if you flip the order. We see this in customer build photos more than any other mistake. Get the assembly done, then paint as one continuous suit.
The rest is straightforward. ABS holds detail work well, takes weathering effects beautifully because the hard surface gives a brush something to actually drag against, and finished ABS armor is lightweight, breathable, and weather resistant for full convention days indoors and out.
Tools and Materials You'll Need
The single biggest reason amateur paint jobs on ABS look amateur is using the wrong materials, not poor technique. We see this constantly in customer build photos: a great kit, well-assembled, with a paint job that breaks down because the wrong product was used somewhere along the way.
Paints
The two brands we reach for most often are Krylon and Rust-Oleum as our main color coats. Both line up well with ABS, both come in a wide range of finishes, and both are widely available at any hardware or craft store.
For flat, no-shine colors (matte tans, dusty greys, the deep flat black you want on a wasteland helmet) we use Camo-brand spray paint. The flat finish out of the can is exactly what apocalyptic armor wants and saves you a clear coat step if you're going for that look.
For detail work (panel lines, small insignia, weathering accents) a brush-on acrylic like Vallejo or Citadel gives you precise control on top of any spray base coat.
A note on paint type: acrylic spray formulas tend to be more forgiving on plastic than oil-based options. If you're not sure, a Krylon or Rust-Oleum can labeled for plastic is a safe default.
Primer (Optional)
This is the part of the guide where most online tutorials get bossy and tell you primer is mandatory. On the ABS plastic our kits use, it isn't. We typically skip primer entirely. ABS takes a Krylon or Rust-Oleum base coat directly, and the result holds up to convention wear without a primer layer underneath.
Where primer can still help: large multi-color builds where a uniform base color makes your topcoats go on with fewer passes, or pieces where you've done a lot of body filler / spot patching and want a single color to unify the surface before color goes down. If you do prime, look for products labeled "adhesion primer for plastic" or "self-etching primer," apply in thin even coats, and let each coat flash off before the next.
If you're new to spray work and want a safety net, primer is a fine choice. Just don't treat it as a required step on ABS.
Masking and Taping
- Painter's tape (blue or green): standard for straight lines and flat masking areas. Green Frog Tape gives crisper edges than cheap blue tape.
- Fine-line tape: for curves and tight detail areas. The flexible masking tape sold in automotive stores works well here.
- Masking fluid / liquid latex: useful for masking small organic shapes that tape can't follow cleanly.
- A sharp hobby knife or X-Acto blade for trimming tape edges.
- Paper or plastic sheeting to cover large areas you don't want overspray on.
Clear Coat / Sealant
Clear coat is recommended, but it isn't strictly required on ABS. A polyurethane clear coat will protect your finish from UV light, rubbing at strap points, and general handling at conventions. You can also leave a finished build uncoated if you want to and the armor will still hold up; the sealant is added insurance, not the load-bearing layer.
The finish you pick matters more than the brand:
- Matte is the right call for apocalyptic / wasteland armor: weathered metal, scavenged plate, anything that should look like it's been through hell. Matte hides minor surface inconsistencies and reads as "real worn material" rather than "freshly molded plastic."
- Gloss is the right call for futuristic, clean armor: chrome-finish power armor, ceremonial pieces, anything where the visual cue is "this just rolled off the line."
- Satin sits in the middle and is a safe default if you're not sure.
This is buyer's preference more than a hard rule. If you have a reference image, match the finish in that image.
Safety Equipment
Don't skip this section:
- Respirator rated for organic vapors (not just a dust mask) when using spray paint or spray primer. Aerosol paints contain solvents that you do not want in your lungs.
- Nitrile gloves: paint-free hands, and some primers will stain skin for days.
- Safety glasses or goggles when doing any close detail work.
- A well-ventilated space: outdoors or in a spray booth. A garage with the door open works. Your bedroom does not.
Step 1: Cleaning the Pieces
Even though ABS doesn't need sanding, it does need to be clean. Wipe each piece down with isopropyl alcohol (70% or higher) on a lint-free cloth to remove any oils, mold release residue, or handling marks. Skin oil alone can cause adhesion failures, so don't skip this even if the piece looks clean.
If you spotted any seams, scratches, or surface defects you want to address with spot putty or plastic filler, this is the moment to do it. Otherwise, you're ready to paint.
Step 2: Base Coat
Base coat is where the piece starts looking like something, which is motivating after the kit-assembly work. With clean ABS in front of you, you can go straight to color.
Spray paint is the fastest path to even coverage on large armor panels. Hold the can 8–12 inches from the surface, work in thin and overlapping passes, and keep your distance consistent. Most armor pieces need two to three base coats to achieve full, even opacity. Multiple thin coats always beat one thick coat: thick coats run, obscure detail, and take much longer to cure.
Brush painting can work well for smaller pieces or when you're doing a complex color breakdown and masking large areas feels like overkill. A good synthetic brush and thinned acrylic can lay down clean coverage without obvious brush strokes if you apply thin coats and let them dry fully between passes. Don't rush.
Airbrush gives you the most control and the smoothest results, but it also requires the most equipment and practice. If you have an airbrush setup and know how to use it, it's the best tool for base coats on detailed pieces. If you don't, spray cans will serve you well.
Temperature and humidity matter. Don't spray paint in direct sunlight or when temps are below 50°F or above 90°F. Paint applied in those conditions won't cure properly and will be more prone to chipping. Humidity above 70% can cause blush (a milky haze in the finish) on certain paints.
Step 3: Detail Work and Masking
Once your base coat is fully cured (not just dry to the touch, fully cured, which may take 24 hours depending on the product), you can start layering detail work.
Two-tone and multi-color areas require masking. Apply painter's tape carefully, pressing down the edges firmly with a fingernail or burnishing tool. For curves and irregular edges, use fine-line tape. Cut tape edges cleanly with a hobby knife. When you peel tape, pull at a low angle rather than straight up. This reduces the risk of lifting base coat along with the tape.
Panel lines (the recessed seams and detail lines built into thermoformed armor) are one of the best reasons to work with hard plastic instead of foam. They hold detail work cleanly. A dark wash (see next section) will pool naturally in recesses. Alternatively, paint panel lines manually with a fine brush using a slightly darker or contrasting color for a sharp, controlled look.
Edge highlighting creates a worn or three-dimensional effect by painting the raised edges of armor panels in a slightly lighter color. This mimics how real metal or painted surfaces catch light and adds significant visual depth. Load a dry brush lightly and drag it along raised edges at a 45-degree angle.
Step 4: Weathering and Battle Damage
This is the fun part. Weathering transforms a painted kit from "toy" to "worn gear," and ABS plastic takes weathering techniques beautifully.
Dry brushing is the workhorse technique for general wear. Load a stiff, wide brush with a light metallic or off-white paint, then wipe most of it off on a paper towel until the brush is nearly dry. Drag it lightly across raised surfaces and edges. The result looks like paint worn down to bare metal, exactly what battle-worn armor looks like.
Dark washes pool in recessed areas (panel lines, bolt holes, engraved detail), creating shadow and visual depth. Mix dark brown, black, or dark gray acrylic heavily thinned with water or medium, apply liberally over a section, then wipe away the excess from raised surfaces before it dries. What stays in the low spots reads as accumulated grime and shadow.
Chipping effects can be done with a sponge, crumpled aluminum foil, or the tip of a brush to stipple metallic paint over edges and stress points. This simulates chips where the outer paint layer has worn through to underlying metal. Very effective on armor that's meant to look well-used.
Bullet holes, scratches, and dents: score fine lines into fully cured paint with a hobby knife tip for realistic scratches. For dents, the ABS surface itself can actually be slightly shaped with careful heat application. Reach out if you want guidance on going that route, since heat work on a finished panel needs a steady hand.
We share build progress and weathering walkthroughs regularly: follow @XposedDesignsLLC on Instagram for technique videos and tutorials.
Step 5: Clear Coat and Sealing (Recommended)
Clear coat locks in your work and protects the finish from the realities of convention life: physical contact, UV light, humidity, and general handling. It's recommended, not required: a sealed armor build will outlast an unsealed one, but the underlying paint will still hold up reasonably well even without it.
If you do clear coat, apply it after all painting and weathering is fully complete and cured. Sealing over partially cured paint layers can cause the layers below to wrinkle or crack.
- Apply in the same thin, even passes you used for the base coat.
- Two to three coats is usually sufficient.
- Let each coat cure between applications.
- Match the finish to the look: matte for apocalyptic builds, gloss for clean futuristic builds, satin as a middle-ground default.
- Focus extra coats on high-contact areas: edges, strap attachment points, any surface that will contact your bodysuit or another armor piece.
Once the clear coat is fully cured, your piece is convention-ready. The sealed surface can be wiped clean with a damp cloth between wears.
Common Mistakes to Avoid
These are the painting and finishing mistakes we see most often on customer-built XPD armor:
Painting before assembling. This is the single biggest mistake we see. XPD kits are designed to be bonded with Contact Cement or Starbond Adhesive Epoxy, and both of those will peel paint off any painted surface they touch. Assemble the kit first, then paint the assembled suit. If you've already painted individual pieces and need to bond them, sand the paint off the contact surfaces before applying adhesive.
Applying coats that are too thick. Thick paint coats run, obscure detail, take forever to cure, and are more likely to crack. Thin coats always win, on every kind of paint.
Not letting layers fully cure. "Dry to the touch" is not the same as "cured." Masking over or sealing under-cured layers causes wrinkling, peeling, and adhesion failures. Patience here pays off.
Using paints not rated for plastic. Most hardware-store cans labeled for metal or wood will not adhere reliably to ABS. Stick with Krylon, Rust-Oleum, Camo-brand for flat colors, and acrylic-formula sprays in general.
Skipping clean-down before painting. Even if a piece looks clean, skin oils and mold-release residue can prevent paint from sticking evenly. Wipe down with isopropyl alcohol before the first coat.
Paint Your Own Kit, Or Let Us Handle It
The unpainted DIY kit is the ideal canvas for this process. You get raw ABS pieces (thermoformed, trimmed, and ready for assembly and finishing) and full creative control over the color story and weathering style. If you want to match a specific reference or push a custom interpretation, starting from bare plastic gives you the most flexibility.
If you'd rather skip straight to wearing the armor, the painted and assembled tier handles all of this for you. Every painted kit from XposedDesigns goes through the same finishing process described above, assembled and finished by the same hands that designed the pieces.
Some of our kits include the power armor cosplay kit, NCR Ranger armor kit, Combat Armor kit, and Dragon Priest Mask kit, to name only a few. Browse the full lineup at xposeddesigns.com.
Planning your build timeline? Our 90-day cosplay armor build guide breaks the full project into phases, including when to do your painting work relative to assembly and final fitment.
Have questions about painting your armor? Drop them in the comments or reach out directly, we're happy to help. Follow @XposedDesignsLLC on Instagram for assembly, paint, and weathering walkthroughs as we build out new kits.